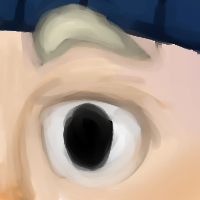
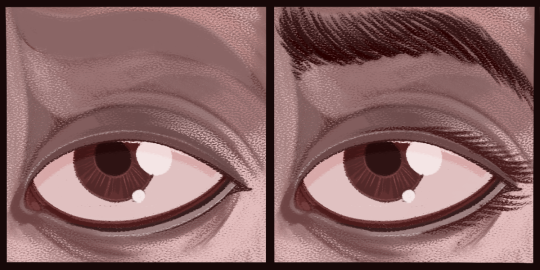
Hi Mods! For ArtFight I made Eyecons (icons hehe) for all my characters by taking the original image, cropping around the eyes, and painting. It was a quick thing for me to do however I don’t like how it looks now. What I’m asking for help with is pretty much Painting Tips and Eye Anatomy help? Thank you!
These are real cute!
I’m not typically a painter, though i really want to get into it - but here’s my two cents on it.
First some eye anatomy:
It’s easy to forego the construction of the eye as a 3-dimensional part if you’re doing semi-realistic or toony art. We rarely ever zoom in enough that the intricate planes of mass that sits around eye are relevant. However, as for closeups like this, we need to address these little, individual and complex parts.
https://www.pinterest.at/pin/462674561717621450/?nic_v2=1aUrbHNU1
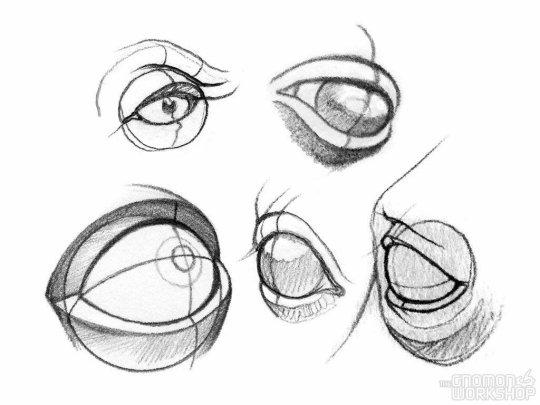
Specifically, i’m refering to the skinfolds and fatpads around the eyeball that encases it. In many studies that you’ll find, at least those that focus on realism - you’ll see that the artists draw the upper and lower eyelid as 3-dimensional objects with a straight plane sitting in tangent to the eyeball. Like a little “sleeve” for your eyeball to comfortably fit in. These are going to be important to us, especially if we intent to paint a closeup, as these little “ledges” around the eyeball is where a lot of light or shadow will be caught, which in turn will give the eye volume.
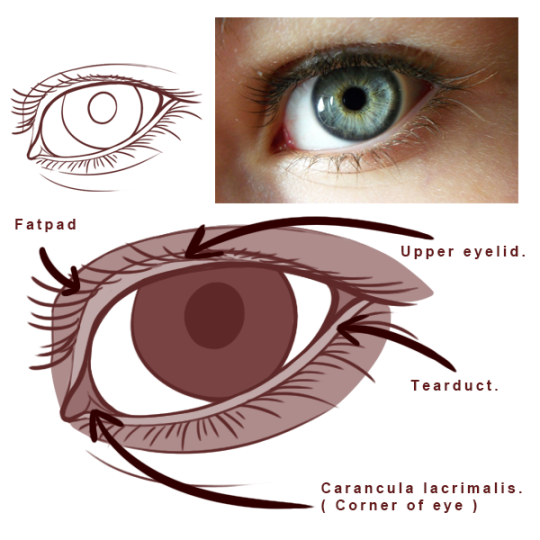
Some parts of the eye are parts we can ignore when doing semi-realism or toony, or when we’re looking at an eye from some distance away. But specific points of interest for us when painting would be the four bits above. The tearduct particularly is interesting since it often catches light, and thusly shows up like the little ledge we talked about in the former paragraph. Additionally, the upper lid, which is seperate from the rest of the brow by a fatpad, which can sometimes also catch the light and stand out like a seperate shape against the fatpad.
Now, painting:
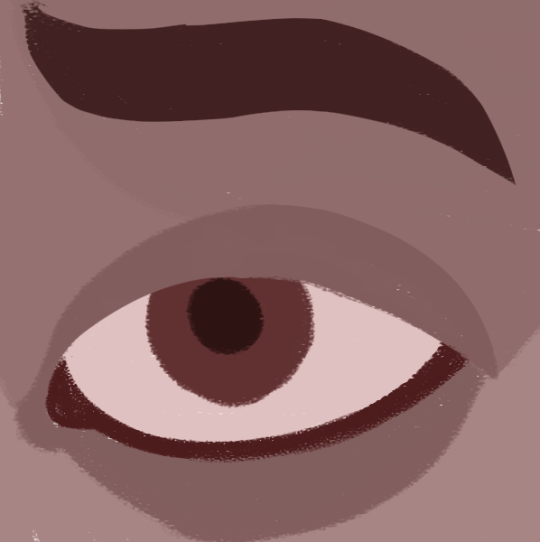
For me; i’ve found that mapping out the base shapes with some degree of precision can help me map out the composition before i even get started with adding volumes, textures and light.
Since i am not super used to painting, i usually do these on top of a sketch or a rough draft.
The colours picked ‘roughly’ match what i imagine will be the final pallette - but as i paint, they change a number of times as i tweak, paint over, and erase while going through the painting.
As i work through the piece, i will blend the sections together, by adding a source of light, and letting the light bleed between the mapped sections. While still maintaining certain shapes, those certain shapes often being most visible and “sharp”. Such like as where the upper eyelid pushes up against the fatpad, or the edge of the tearduct at the corner of the eye.
In overall I treat painting a lot like carving a sculpture in wood, you need to bring out the large and crude shapes first, before you can add the smaller, more delicate ones.
Creativebloq.com has another, really nice article about painting digitally and the rough, overall approach to it, all summed up in simple steps. You can find it here:
https://www.creativebloq.com/features/digital-painting-with-photoshop-cc-for-beginners
- Mod Wackart ( ko-fi )
from The Redline Station https://ift.tt/3ksu8SQ
via IFTTT

No comments:
Post a Comment